Transmission fluid is vital for the smooth operation of your Land Cruiser’s drivetrain. It lubricates, cools, and transmits power between various components, ensuring optimal performance and longevity. However, a transmission fluid leak can lead to significant problems, including reduced efficiency and potential damage to internal components. Prompt attention to leaks is essential to maintain your vehicle’s performance and reliability.
Identifying the source of a transmission fluid leak in your Land Cruiser can be a straightforward process if you know where to look. Common culprits include worn seals, damaged gaskets, and loose connections. Regular inspections can help you catch these issues early before they turn into more severe problems that could require costly repairs.
In this guide, we will explore practical steps to diagnose and fix transmission fluid leaks in your Land Cruiser. We will cover common symptoms to watch for, methods for identifying the source of the leak, and effective repair techniques. Understanding these aspects will empower you to take control of your vehicle’s maintenance and ensure its transmission remains in excellent condition.
Identifying the Source of Transmission Fluid Leaks

Identifying the source of transmission fluid leaks in a Land Cruiser requires a systematic approach. By pinpointing the exact location of the leak, you can apply an appropriate fix and prevent further damage to the transmission system.
Here are the common areas to inspect for leaks:
- Transmission Pan: Check for cracks or loose bolts around the transmission pan. This is often a primary source of fluid leaks.
- Seals and Gaskets: Inspect the seals and gaskets, particularly the input and output shaft seals. Worn or damaged seals can lead to significant fluid loss.
- Transmission Cooler Lines: Examine the cooler lines for any signs of wear or corrosion. These lines can develop small holes that may cause fluid to leak.
- Transmission Case: Look for signs of damage or cracks in the transmission case itself. Any imperfections can lead to leaks.
Follow these steps to find the leak:
- Visual Inspection: Start with a thorough visual inspection of the areas mentioned above. Look for any puddles of fluid underneath the vehicle.
- Check Fluid Levels: Regularly check the transmission fluid levels. A drop in fluid levels can indicate a leak.
- Smell and Feel: Transmission fluid has a distinct smell. If you notice a burnt odor, or if the fluid feels sticky, this could indicate a problem.
- Clean and Monitor: Clean the area around suspected leak points and monitor for fresh fluid accumulation. This helps to identify the exact leak source.
By carefully inspecting these areas and following the systematic approach, you can effectively identify the source of transmission fluid leaks in your Land Cruiser.
Step-by-Step Guide to Repair Common Leak Areas
Identifying and repairing transmission fluid leaks in your Land Cruiser involves a systematic approach. Here is a detailed guide to help you address common leak areas effectively.
Step 1: Safety First
Before starting the repair process, ensure the vehicle is parked on a level surface. Engage the parking brake and wear appropriate safety gear, such as gloves and goggles.
Step 2: Locate the Leak
Check for transmission fluid leaks by inspecting the ground underneath the vehicle. Transmission fluid is typically red or brown. Look for puddles or stains, as well as signs of fluid on the transmission case.
Step 3: Inspect Common Leak Points
Common areas for transmission fluid leaks include:
- Transmission Pan Gasket: Examine the gasket where the pan meets the transmission. A worn or damaged gasket can lead to leaks.
- Seals: Check the input and output shaft seals. These are frequent sources of leaks when they become worn over time.
- Transmission Cooler Lines: Inspect the lines that run to the cooler for any signs of fluid damage or corrosion.
- Mounting Points: Look closely at transmission mounting points and bolts. Loose bolts can lead to leaks.
Step 4: Perform Necessary Repairs
If you identify a leak, follow these repairs:
- Replace the Gasket: For the transmission pan gasket, drain the fluid, remove the pan, and replace the gasket. Reinstall the pan securely.
- Change the Seals: If the seals are damaged, it’s best to replace them. This may require removing the transmission from the vehicle for access.
- Repair the Lines: For leaking cooler lines, tightening connections may suffice. If they’re corroded, replacing the lines is vital. Be cautious of any pressurized fluid when handling these components.
- Tighten Bolts: Ensure all mounting bolts are tightened according to the manufacturer’s specifications. This can prevent leaks due to loose fittings.
Step 5: Refill Transmission Fluid
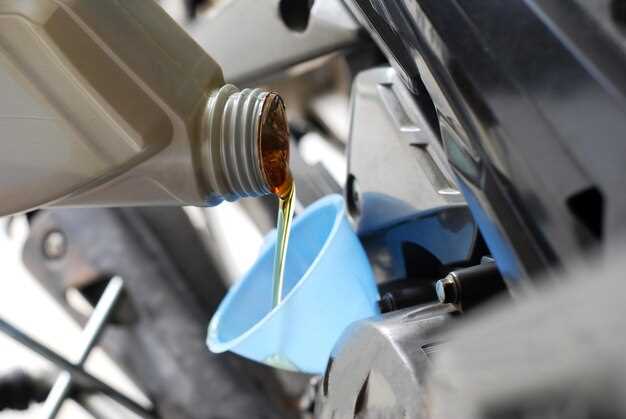
Once repairs are complete, refill the transmission with the correct type of fluid. It’s essential to use the fluid specified in your vehicle’s manual to ensure optimal performance.
Step 6: Test for Leaks
After refilling, start the engine and allow it to reach operating temperature. Check the repaired areas for any signs of leakage. Drive the vehicle briefly and recheck the fluid levels to ensure they are adequate.
By following these steps, you can effectively repair common leak areas in your Land Cruiser’s transmission system, helping to maintain its performance and longevity.
Maintaining Optimal Transmission Fluid Levels After Repairs

After addressing a leak in your Land Cruiser’s transmission fluid, it is crucial to maintain optimal fluid levels to ensure smooth operation. Regularly checking the transmission fluid should become part of your routine maintenance. This involves inspecting the fluid level using the dipstick, if equipped, and verifying that it falls within the recommended range. An inadequate fluid level can lead to increased wear and tear on the transmission components.
To maintain the correct fluid level, ensure that the transmission is at the proper operating temperature and on a level surface during the check. If you find the fluid level low, add fluid that meets the manufacturer’s specifications to prevent any adverse effects on the transmission’s performance. Using the wrong fluid type can cause further leaks or damage.
Additionally, keep an eye on the seals and gaskets following repairs. New leaks can develop if these components are not securely in place or if they deteriorate over time. A visual inspection for any signs of leakage around the transmission pan and cooler lines will help catch any new issues early.
Establishing a schedule for periodic fluid changes based on your driving conditions can also improve longevity. Heavy towing, frequent stop-and-go traffic, or extreme weather may necessitate more frequent fluid changes. This proactive approach can help prevent leaks and maintain the overall health of your transmission system.
