As classic vehicles continue to gain popularity among automotive enthusiasts, older Toyota Land Cruiser models are often celebrated for their robustness and reliability. However, with age comes a myriad of potential electrical issues that can affect the performance and safety of these iconic SUVs. From aging wiring harnesses to outdated electrical components, understanding these challenges is crucial for anyone looking to maintain or restore a vintage Land Cruiser.
The complexities of the electrical systems in older Land Cruisers can often lead to frustrating problems. Common issues include malfunctioning lights, inconsistent ignition systems, and even complete electrical failures. Regular diagnostics are essential for identifying these problems early on, preventing minor issues from escalating into costly repairs. A proactive approach to electrical diagnostics not only ensures optimal performance but also preserves the classic appeal of these beloved vehicles.
In this article, we will explore the most frequently encountered electrical issues in older Land Cruiser models and provide insights into effective diagnostic techniques. Whether you’re a seasoned mechanic or a passionate owner, understanding these electrical challenges will equip you with the knowledge needed to keep your Land Cruiser running smoothly for years to come.
Common Wiring Problems in Older Land Cruisers

The older models of Land Cruisers are known for their durability and reliability, but they often face wiring issues that can affect performance. Over time, the electrical systems in these vehicles can degrade, leading to various complications.
One prevalent issue is corroded connectors. Exposure to moisture and road salts can lead to rust and corrosion on wiring terminals, which hinders electrical flow. This can result in malfunctioning lights, failed sensors, or intermittent power loss.
Additionally, cracks in the insulation of the wiring can develop due to age and wear. These cracks expose the inner wires, increasing the risk of short circuits. This condition not only compromises the functionality of the vehicle but also poses a fire hazard.
Sometimes, older Land Cruisers might exhibit problems due to poor splicing in previous repairs. Improperly spliced wiring connections can create resistance or lead to shorts, causing electrical components to fail unexpectedly.
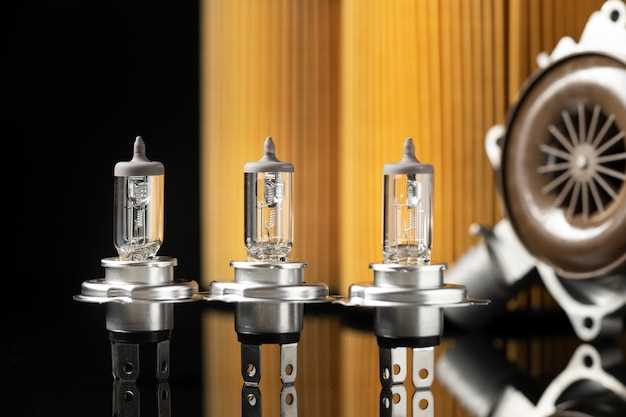
Furthermore, the headlight wiring may be particularly susceptible to issues. Dimming headlights can be a sign of weak connections or outdated wiring. This not only affects visibility but can also strain the electrical system.
Regular inspections of the wiring harness and electrical connections can help identify these issues early. Keeping an eye out for signs of wear or corrosion can save time and money in the long run, ensuring the Land Cruiser continues to perform reliably.
Step-by-Step Diagnostics for Electrical Failures

Diagnosing electrical issues in older Land Cruiser models requires a systematic approach. Follow these steps to effectively identify and resolve problems.
Step 1: Visual Inspection
Begin with a thorough visual inspection of the vehicle’s electrical system. Check for any visible signs of wear, corrosion, or loose connections, especially around battery terminals, fuse boxes, and wiring harnesses. Pay attention to ground connections, as poor grounding can lead to various electrical failures.
Step 2: Battery Health Check
Test the battery’s voltage using a multimeter. A healthy battery should read around 12.6 volts when fully charged. If the voltage is significantly lower, consider charging or replacing the battery. Additionally, inspect the battery cables for fraying or corrosion that may impede electrical flow.
Step 3: Check Fuses
Locate the fuse box and examine each fuse for continuity. A blown fuse can indicate an electrical short or overloaded circuit. Replace any blown fuses with the correct amperage rating and monitor the system for recurrences.
Step 4: Use a Multimeter for Voltage Testing
With the multimeter, test the voltage at various points in the electrical system, including the ignition switch, alternator, and electrical components such as lights and sensors. Ensure that voltage readings are within specified ranges according to the Land Cruiser’s service manual.
Step 5: Ground Testing
Check the integrity of ground connections, as poor grounds can cause faulty behavior in various electrical systems. Use the multimeter to measure resistance between ground points and the battery negative terminal. Resistance should be minimal; high values indicate a bad ground that requires attention.
Step 6: Component Testing
Identify and test individual electrical components such as relays, switches, and sensors. Replace components that show signs of malfunction during testing. Utilize the service manual for specifications and testing procedures.
Step 7: Scan for Error Codes
If available, utilize an OBD-II scanner to check for any stored trouble codes. Codes can provide insight into specific electrical faults within the vehicle’s systems. Research the codes to understand the underlying issues that may need addressing.
Step 8: Consult with Professionals
If electrical issues persist after performing these diagnostics, consider consulting a professional mechanic or an automotive electrician. Their expertise can help identify complex problems that may not be evident through basic troubleshooting.
By adhering to this step-by-step diagnostics process, you can effectively pinpoint and address electrical failures in older Land Cruiser models, ensuring their longevity and reliability on the road.
Tools and Techniques for Repairing Electrical Systems
Repairing electrical systems in older Land Cruiser models necessitates the use of specific tools and techniques to ensure reliable results. The first step is to gather essential tools, including a multimeter for checking voltage, current, and resistance in wiring. A good quality wire stripper will be crucial for preparing wires for connections, while soldering equipment can provide strong, permanent joints that withstand vibrations.
Circuit Diagrams are invaluable when diagnosing electrical issues. These diagrams illustrate the wiring layout and enable technicians to trace problems effectively. Having access to service manuals that detail the specific electrical systems of each model can significantly aid in the troubleshooting process.
When it comes to repairing or replacing faulty wiring, it’s important to use wire that matches the original specifications. This ensures compatibility and longevity. Techniques such as heat shrink tubing can be beneficial when insulating soldered connections, providing protection against moisture and physical damage.
In cases of corrosion, cleaning tools such as wire brushes or contact cleaners can help restore electrical connections. Regular maintenance practices, like inspecting and cleaning battery terminals, can prevent future issues arising from electrical resistance caused by corrosion.
Fuse testing should also be undertaken when diagnosing electrical problems. Multimeters can help determine if fuses are functional, while visually inspecting for melted connections can offer immediate insight. In older models, consider replacing old fuses with modern equivalents that may offer better performance and safety.
Finally, employing systematic troubleshooting techniques, such as isolating components and testing them individually, can lead to quicker resolution of complex electrical problems. Keeping detailed notes during diagnostics can help track recurring issues and streamline repairs in future maintenance sessions.
