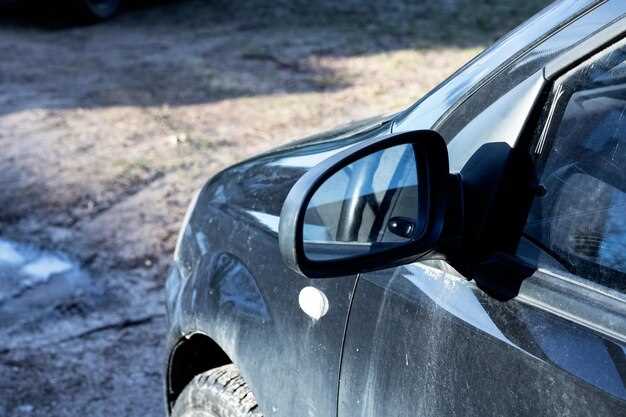
When it comes to your Land Cruiser, every component plays a vital role in ensuring safety and performance on the road. One such component is the side mirror, which provides crucial visibility for safe driving. A broken or damaged mirror not only compromises your ability to see other vehicles but can also result in legal issues. In this diy guide, we will walk you through the steps to replace a broken Land Cruiser side mirror effectively and efficiently.
Replacing a side mirror may seem daunting, but with the right tools and a little patience, you can handle this task yourself. This guide aims to provide you with a clear, step-by-step approach to ensure that you can restore your vehicle’s functionality without the need for a professional mechanic. We will cover everything from gathering your materials to the final installation, making the process as straightforward as possible.
As you embark on this diy project, remember that attention to detail is key. The side mirror not only enhances your vehicle’s appearance but is also essential for maintaining optimal driving conditions. Let’s get started and ensure your Land Cruiser is safe and ready for the road once more!
Identifying the Right Replacement Mirror for Your Land Cruiser
Choosing the correct replacement side mirror for your Land Cruiser involves several important steps. First, identify the model year and trim of your vehicle, as specifications can vary significantly across different years and models. Consult the owner’s manual or manufacturer’s website for precise details.
Next, determine whether you need a manual or powered side mirror. Many Land Cruiser models come equipped with power mirrors, which require specific wiring and connectors. For a DIY replacement, ensure you are comfortable working with electrical components if you opt for a powered mirror.
Consider the mirror’s features, such as built-in turn signals, heating functions, or cameras, which may influence your choice. Many aftermarket mirrors replicate OEM specifications but may lack additional features. Decide whether you prefer an OEM part for guaranteed compatibility or an aftermarket option that often offers cost savings.
Additionally, check the mirror glass type, whether it’s flat, convex, or features anti-dazzle technology. The right glass type is crucial for proper visibility and safety while driving. Verify that the mounting brackets and housing are correctly designed for a seamless fit to avoid alignment issues during installation.
Finally, read reviews and feedback on various brands, focusing on their durability and performance. Ensure that the replacement mirror meets your needs and preferences before purchasing. Following these steps will help you select the right side mirror for your Land Cruiser, enhancing both functionality and appearance.
Step-by-Step Instructions for Removing the Damaged Side Mirror

To begin the process of removing a damaged side mirror, you will need a few tools: a screwdriver, a socket wrench set, and a trim removal tool. Ensure that the vehicle is parked on a flat surface and that the engine is off.
Step 1: Start by disconnecting the battery to avoid any electrical mishaps. Locate the battery terminal and use a wrench to remove the negative cable.
Step 2: Inside the vehicle, look for the trim around the side mirror. Use a trim removal tool to gently pry off the interior cover. Be cautious not to break the plastic clips that hold it in place.
Step 3: Once the cover is removed, you will see the wiring harness connected to the side mirror. Carefully disconnect the harness by pressing the release tab and pulling it apart.
Step 4: Locate the screws securing the side mirror to the door. Use a socket wrench or screwdriver to remove these screws completely. Store the screws in a safe place for later reinstallation.
Step 5: With the screws removed, gently slide the damaged side mirror away from the door. Be careful not to scratch the paint on your vehicle.
Step 6: If the mirror is attached with adhesive or additional clips, carefully detach it using a gentle rocking motion. Avoid using excessive force to prevent damage to the door panel.
Step 7: Inspect the area for any remaining components that may need to be removed before you can replace the side mirror.
Your damaged side mirror is now successfully removed, and you are ready to install a new one following similar steps in reverse order.
Correct Installation of a New Side Mirror: Tips and Tricks

Installing a new side mirror on your Land Cruiser may seem daunting, but following the right steps can make the process smooth and efficient. Here are some practical tips and tricks for a successful DIY installation.
- Gather Necessary Tools: Before you begin, ensure you have all the required tools. Typically, you will need a screwdriver, socket wrench, and possibly a trim removal tool.
- Choose Quality Parts: Invest in a high-quality mirror that is compatible with your Land Cruiser model. This ensures durability and correct fit.
- Disconnect the Battery: For safety, disconnect the vehicle’s battery. This prevents any electrical issues, especially if your new mirror includes electronic features.
- Remove the Old Mirror: Carefully detach the broken mirror from the door. Use a trim removal tool to avoid damaging the surrounding area. Keep all screws and components handy for reinstallation.
- Install the New Mirror: Position the new mirror in place. Align it properly with the mounting points. Start by securing it with screws, but only hand-tighten them until all screws are in place.
- Connect Electrical Wires: If your mirror has electrical functions, connect the wires according to the manufacturer’s instructions. Ensure the connections are secure to prevent malfunctions.
- Tighten Everything Down: Once everything is aligned and connected, go back and fully tighten all screws. Make sure the mirror is firmly attached and does not wiggle.
- Reconnect the Battery: After ensuring everything is properly installed, reconnect the battery. Test the mirror’s functionality, including any electronic features.
- Final Adjustments: Adjust the mirror to your preferred angle to ensure optimal visibility while driving.
By following these steps, you can successfully replace your Land Cruiser’s side mirror. Remember, a careful and methodical approach leads to the best results in your DIY project.
