

Replacing a windshield on your Land Cruiser is a crucial maintenance task that not only enhances the vehicle’s aesthetics but also ensures the safety of its occupants. A well-functioning windshield provides structural integrity and clear visibility, which are essential for safe driving. This guide will equip you with the necessary knowledge to undertake this replacement process with confidence.
In this comprehensive article, we will delve into the step-by-step procedure for effectively replacing your Land Cruiser windshield. From gathering the right tools to ensuring the new glass is securely installed, each step will be outlined clearly to facilitate a seamless replacement experience. Proper execution of this task can prevent numerous issues down the line, such as water leaks and reduced visibility caused by improper installation.
Whether you are a seasoned DIY enthusiast or a first-time car maintainer, our guide will serve as a valuable resource. With attention to detail and safety protocols, you can ensure that your vehicle is equipped with a high-quality windshield, ready to withstand road challenges. Let’s get started on the process of replacing your Land Cruiser windshield.
Tools and Materials Needed for Windshield Replacement
Replacing a windshield requires specific tools and materials to ensure a proper installation. Below is a comprehensive list that will aid in the replacement process.
Tools:
- Windshield removal tool: A dedicated tool designed to cut through the adhesive holding the windshield in place. Options include a wire cutter or a specialized windshield removal knife.
- Utility knife: Essential for carefully trimming away any old adhesive around the frame of the vehicle.
- Screwdrivers: Both Phillips and flathead screwdrivers may be needed to remove any trim or components obstructing the windshield.
- Socket set: Useful for removing bolts and brackets that may be securing the windshield or its surrounding elements.
- Rubbing alcohol or adhesive remover: Important for cleaning the frame and ensuring a proper bond with the new adhesive.
- Caulking gun: Required to apply new adhesive before installing the replacement windshield.
- Protective gloves: To safeguard your hands from sharp edges and the adhesive.
- Safety glasses: Essential for protecting your eyes during the replacement process.
- Windshield installation tool: A suction cup tool can help position and lift the windshield into place accurately.
Materials:
- Replacement windshield: Choose a windshield that matches the make and model of your Land Cruiser for optimal fit and function.
- Adhesive sealant: A high-quality automotive adhesive designed for windshield installations, ensuring a strong and durable seal.
- Primer: If necessary, use a primer to prepare the bonding surface for better adhesion of the sealant.
- Weather stripping or sealant tape: Used to protect the frame from moisture and debris after the windshield is installed.
Having these tools and materials readily available will streamline the windshield replacement process, ensuring you achieve a secure and effective installation.
Step-by-Step Process for Removing the Old Windshield
To begin the process of removing the old windshield, gather essential tools such as a utility knife, a suction cup tool, and safety gloves. Ensure you have a clean work area and sufficient lighting for visibility.
Start by preparing the interior of your Land Cruiser. Remove any trim pieces surrounding the windshield. This may include the A-pillars and any dashboard components that obstruct access to the windshield edges. Use a trim removal tool to avoid damaging the interior surfaces.
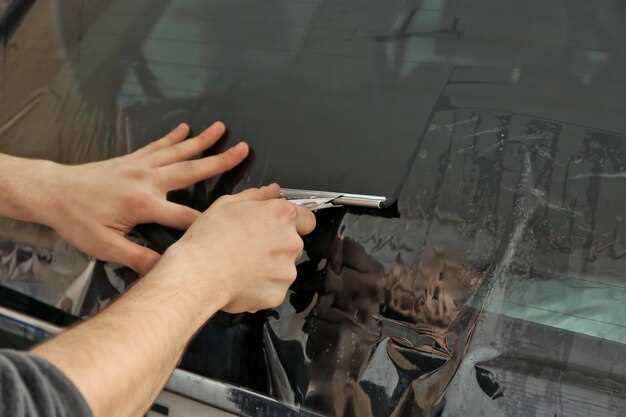
Next, inspect the windshield for any signs of damage or cracks. Cut the windshield sealant using a utility knife. Carefully insert the knife between the glass and the body of the vehicle, applying steady pressure to slice through the sealant. Work your way around the entire perimeter of the windshield, ensuring all the adhesive is cut away.
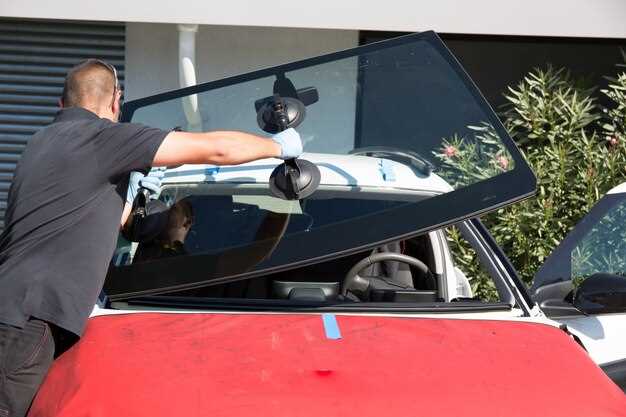
Once the adhesive is cut, attach the suction cups to the windshield. This provides a secure grip to help lift the glass safely. Ensure the cups are firmly attached before proceeding.
With the suction cups in place, gently pull the windshield away from the vehicle. Be cautious during this step, as the glass may be heavy and could break if not handled properly. If the windshield does not come loose easily, check for any remaining adhesive that may need additional cutting.
After removing the windshield, clean the bonding surface on the vehicle. Use a scraper or a cloth to remove any residual adhesive, dirt, or debris. This step is crucial for ensuring a proper seal with the new windshield.
Finally, dispose of the old windshield responsibly, following any local regulations for glass disposal. You are now ready to install the new windshield.
Installing the New Windshield: Key Considerations
When it comes to replacing the windshield of your Land Cruiser, several key considerations must be kept in mind to ensure a successful installation. First and foremost, it is crucial to choose a high-quality replacement windshield that meets the specifications set by the manufacturer. This ensures not only a proper fit but also maintains the integrity and safety of the vehicle.
Before beginning the installation process, make sure to gather all necessary tools and materials. Commonly required items include a suction cup tool, a utility knife, glass cleaner, and weatherstripping adhesive. Having these on hand will streamline the replacement process.
Proper preparation of the vehicle is essential. Clean the edges of the frame thoroughly to remove old adhesive and debris, as this ensures a secure bond for the new windshield. Inspect the frame for any corrosion or damage that might affect the installation; addressing these issues beforehand can prevent future complications.
During the actual installation, it is advisable to work with at least one assistant. Aligning and securing the windshield requires precision and care. Make sure to apply the adhesive evenly around the edge of the frame before carefully placing the new windshield into position. Ensure that it sits evenly and securely.
After the windshield is installed, allow adequate time for the adhesive to cure as recommended by the manufacturer. This is vital for the durability of the replacement and the safety of the vehicle occupants. Refrain from driving the vehicle for at least an hour after the installation to allow the adhesive to set properly.
Lastly, after the installation is complete, check for any leaks or gaps around the edges of the windshield. A proper seal is crucial to prevent water intrusion and ensure optimal performance of the windshield wipers. Taking these considerations into account will lead to a successful replacement and enhance the longevity of your new windshield.