

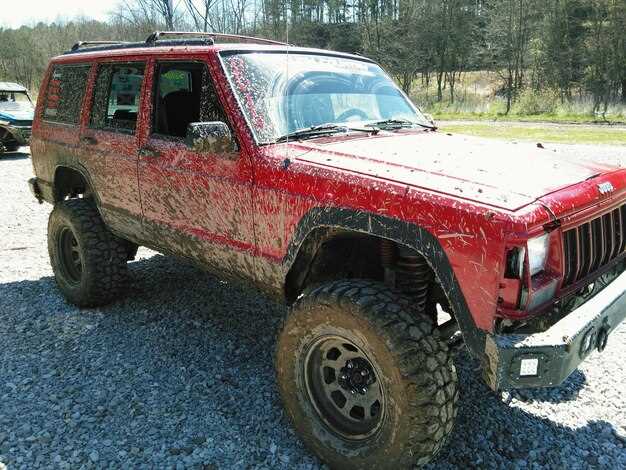
Off-roading in your Land Cruiser can be an exhilarating adventure, but it often comes with the risk of damage to your vehicle’s body. Whether you’ve encountered rocky terrains, deep mud, or unexpected obstacles, understanding the necessary repair processes is crucial for maintaining the integrity and performance of your vehicle.
After experiencing off-road damage, the first step is to assess the condition of your Land Cruiser thoroughly. Look for any visible signs of harm, including scratches, dents, and rust, as well as more serious issues like frame alignment and structural integrity. Each of these factors plays a significant role in how well your vehicle performs in future adventures.
Implementing a systematic approach to repair will not only restore your Land Cruiser’s appearance but also ensure its safety and reliability. From minor touch-ups to extensive repairs, understanding the different components of your vehicle’s body is essential for effective restoration. With the right tools and knowledge, you can bring your Land Cruiser back to its prime condition, ready for the next challenge on the trails.
Assessing the Extent of Body Damage Post Off-Roading
After an adventurous off-road experience, it’s crucial to thoroughly evaluate the body of your Land Cruiser for any damage. Start by inspecting the exterior for visible dents, scratches, and cracks. A careful visual examination will help identify areas that may require repair. Pay special attention to the bumpers, fenders, and wheel wells, as these components often bear the brunt of off-road impacts.
Next, assess the alignment of body panels. Check if doors, hoods, and trunk lids open and close smoothly. Misalignment may indicate underlying structural damage. Use a flashlight to look for any signs of bent metal or irregular gaps between body sections.
Don’t forget about hidden damage. Look beneath the vehicle for issues that might not be immediately visible from above, such as bent brackets or damaged mounts. If you notice any fluid leaks or strange noises, these could be indicators of more significant problems that need attention.
If superficial damage is spotted, consider how deep it goes. Scratches might just need sanding and repainting, while deeper dents may require professional repair techniques to restore the original shape. Document the damage with photographs before starting any repairs, as this will assist in guiding your restoration efforts and may be useful for insurance claims if applicable.
Finally, evaluating the extent of body damage post off-roading is essential for a successful restoration. Identifying all issues early will help ensure that your Land Cruiser remains reliable and ready for future adventures.
Step-by-Step Guide to Repairing Scratches and Dents
Restoring the body of your Land Cruiser after off-road adventures involves addressing scratches and dents. Below is a step-by-step guide to help you through the repair process.
Step 1: Assess the Damage
Begin by thoroughly inspecting the affected areas. Identify the depth of scratches and extent of dents. This will determine the repair methods and materials you will need.
Step 2: Gather Your Materials
Acquire the necessary supplies for the repair. You will need sandpaper (various grits), a repair filler or putty, primer, automotive paint that matches your vehicle’s color, and a clear coat. Additionally, have soft cloths and rubbing compound on hand for finishing touches.
Step 3: Clean the Area
Clean the damaged body area with soap and water to remove dirt and grime. Dry it thoroughly before starting the repair process. This ensures proper adhesion of the repair materials.
Step 4: Sand the Scratch and Dent
For scratches, use fine-grit sandpaper (around 2000 grit) to gently sand the area, blending it with the surrounding paint. For dents, use a more coarse sandpaper (around 600 grit) to smooth the edges of the dented area before applying filler. Avoid excessive sanding to prevent damage to the surrounding paint.
Step 5: Apply Repair Filler
For deeper scratches and dents, apply a repair filler or putty. Use a plastic spreader to ensure an even application, pressing the filler into the dent. Allow the filler to cure as per the manufacturer’s instructions.
Step 6: Sand the Filler
Once the filler has cured, use fine-grit sandpaper to smooth it out until it is flush with the surrounding body surface. This step may require multiple passes to achieve a seamless finish.
Step 7: Prime the Area
After sanding, apply a coat of primer to the repaired area. This promotes better adhesion of the paint and helps to prevent rust. Allow the primer to dry completely before proceeding.
Step 8: Paint the Repaired Area
Using the matching automotive paint, apply several thin coats over the primer. Allow each coat to dry before applying the next one. This ensures a more even and durable finish.
Step 9: Clear Coat Application
Once the paint is completely dry, apply a clear coat to protect the repair and restore the gloss of the original finish. Follow the same process of applying several thin coats, allowing each to dry properly.
Step 10: Final Touches
After the clear coat has cured, gently buff the repaired area using a soft cloth and rubbing compound. This helps to blend the repaired section with the surrounding paint and enhance shine.
By following these steps, you can effectively restore the body of your Land Cruiser, addressing scratches and dents to ensure it looks its best for your next adventure.
Choosing the Right Parts and Tools for Restoration
When restoring your Land Cruiser after off-road damage, selecting the right parts and tools is crucial for ensuring the vehicle’s longevity and performance. Begin by assessing the extent of the damage to both the body and mechanical components. This evaluation will guide you in prioritizing your restoration efforts and allocating your budget effectively.
For body repairs, focus on sourcing high-quality replacement parts that match the original specifications. OEM (Original Equipment Manufacturer) parts are recommended for optimal fit and finish, ensuring that the restoration maintains the vehicle’s structural integrity. If OEM parts are unavailable, look for reputable aftermarket options that have been tested for durability and compatibility with off-road conditions.
In addition to body parts, consider the tools necessary for the restoration process. Basic hand tools such as wrenches, screwdrivers, and pliers are essential for disassembling damaged components. Invest in quality power tools like impact wrenches and angle grinders, as these will significantly speed up your work, especially when dealing with stubborn rusted or damaged sections.
Don’t overlook specialized tools that can facilitate repairs specific to off-road vehicles. A body repair kit, for example, can be invaluable for fixing dents and scratches that occur during off-road adventures. A good set of jacks and lifts is necessary for safely elevating the vehicle during maintenance, allowing for easier access to the undercarriage and suspension systems.
Lastly, ensure you have a reliable source for replacement parts and tools, whether it be local auto parts stores, online retailers, or salvage yards specializing in off-road vehicles. Building relationships with these suppliers can provide insights into the best products and tools for your restoration project, enabling you to make informed decisions that promote a successful repair and enhancement of your Land Cruiser.