

Upgrading the headlights of classic Land Cruisers to LED technology is an excellent way to enhance both aesthetics and functionality. Traditional halogen bulbs, while charming, often fall short in terms of brightness and energy efficiency. Transitioning to LED lights not only offers superior illumination but also ensures a longer lifespan, making it a worthwhile investment for any vintage vehicle enthusiast.
Installing LED headlights can significantly improve nighttime visibility, providing a safer driving experience. The bright, white light emitted by LEDs closely resembles daylight, which not only enhances road visibility but also reduces eye strain during night driving. Furthermore, the lower energy consumption of LEDs places less strain on the vehicle’s electrical system, making it an eco-friendly upgrade that is also gentle on your classic ride’s battery.
This article will guide you through the process of carefully selecting the right LED headlights for your Land Cruiser, as well as step-by-step instructions for installation. Whether you’re looking to preserve the vintage character of your classic car while adding modern convenience or simply aiming for a style upgrade, these tips will ensure you achieve the perfect balance of form and function.
Choosing the Right LED Headlight Kit for Your Land Cruiser

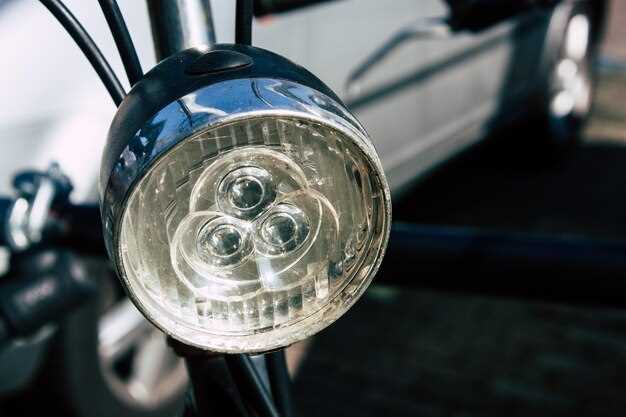
When it comes to enhancing the lighting performance of your classic Land Cruiser, selecting the right LED headlight kit is crucial. The first step is to ensure compatibility with your vehicle’s existing wiring and fixture size. Most classic Land Cruisers typically utilize H4 or sealed beam headlights, so look for kits designed specifically for these applications.
Consider the lumen output of the LED lights. A higher lumen count means brighter lighting, which is essential for better visibility during nighttime driving. Opt for kits that offer at least 3,000 lumens per set, as this will provide a significant improvement over standard halogen lights.
Another important factor is the beam pattern. You want a kit that delivers a clear, well-defined beam that provides adequate illumination without blinding oncoming drivers. Look for products that are labeled as having a focused beam design to ensure safe and effective lighting.
Heat management is vital for longevity and performance. LED headlights generate less heat than traditional bulbs, but they still require proper cooling solutions. Check for kits equipped with built-in fans or heat sinks, which will help maintain optimal operating temperatures and extend the lifespan of the LEDs.
Lastly, consider the color temperature of the LEDs. A color temperature range of 6,000 to 7,000 Kelvin is typically preferred, as it provides a bright white light that mimics natural daylight. This enhances visibility and makes driving at night more comfortable.
By evaluating these factors–compatibility, lumen output, beam pattern, heat management, and color temperature–you can select the perfect LED headlight kit to upgrade your classic Land Cruiser for improved safety and performance on the road.
Step-by-Step Installation Process for LED Headlights
Installing LED headlights in a classic Land Cruiser enhances visibility and gives the vehicle a modern touch. Follow these steps for a successful installation.
Step 1: Gather Necessary Tools and Materials
Before starting the process, ensure you have all required tools. You will need a screwdriver set, socket wrench, wire connectors, and the LED headlight kit designed for your Land Cruiser model. Additionally, a multimeter can help in checking connections.
Step 2: Remove the Existing Headlights
Begin by turning off the vehicle and disconnecting the battery. This prevents any electrical shorts during installation. Locate the headlight assembly on each side, typically secured by screws or clips. Carefully detach the assembly and remove the old halogen headlights from the sockets.
Step 3: Prepare the LED Headlight Assembly
Take the new LED headlights and inspect the connectors. If necessary, adapt the connectors using the supplied wiring harness or adapters to ensure compatibility with your Land Cruiser’s electrical system. Proper connections will prevent flickering and other issues.
Step 4: Install the LED Headlights
Insert the LED headlights into the headlight housing. Align them properly to avoid misfits. Once positioned correctly, secure the headlights in place using screws or clips. Ensure that the bulbs are locked into the sockets properly to maintain functionality.
Step 5: Connect Wiring
Connect the LED headlight wiring to the vehicle’s electrical system. Follow the manufacturer’s wiring diagram provided with your LED kit. Make sure to use wire connectors to secure the connections, ensuring a stable and safe setup.
Step 6: Test the New Headlights
Once everything is connected, reconnect the battery and turn on the vehicle. Test both the low and high beam settings of the LED headlights. Ensure that they light up correctly and are aimed at the appropriate angle for optimal visibility.
Step 7: Adjust Headlight Aim
Check the aiming of the headlights. If they are too high or low, use the adjustment screws on the headlight assembly to align them. Proper aim ensures maximum effectiveness and prevents blinding other drivers on the road.
Step 8: Finalize Installation
After successful testing and adjustment, reassemble any removed components of the headlight assembly. Make sure all screws are tightened, and everything is secured. Dispose of the old halogen headlights responsibly.
Following these steps will ensure a smooth installation of LED headlights in your classic Land Cruiser, enhancing both safety and style on the road.
Troubleshooting Common Issues After Installation
After installing LED headlights on your classic Land Cruiser, you may encounter a few common issues. Addressing these problems promptly can enhance your driving experience and ensure optimal performance of the new lights.
One frequent issue is flickering headlights, which can occur due to incompatible wiring or insufficient voltage. Check the connections for any loose wires or poor contacts. Consider installing a relay harness to stabilize the power supply and eliminate flickering.
If the headlights are not turning on at all, verify that the LED bulbs are properly seated in the sockets. Ensure the polarity is correct, as LED headlights are sensitive to power orientation. If the bulbs are still unresponsive, test the vehicle’s fuse related to the headlights.
Another challenge can be improper beam alignment. LED headlights often have a different light distribution compared to traditional halogen bulbs. Use a flat surface to check and adjust the aim of your headlights. This adjustment is crucial to avoid blinding oncoming traffic and ensuring adequate roadway illumination.
Overheating can also be a concern, especially in tightly packed engine compartments. Ensure that the LED units have adequate ventilation and that heat sinks are not obstructed. If overheating persists, consider upgrading to higher-quality LEDs with built-in cooling features.
Lastly, some users report compatibility issues with the vehicle’s warning systems. If you experience dashboard warnings or flickering lights, an anti-flicker adapter may be necessary. This adapter helps to bridge the compatibility gap between traditional wiring and modern LED technology.
By being proactive in troubleshooting these common issues after installation, you can fully enjoy the benefits of LED headlights on your classic Land Cruiser.