

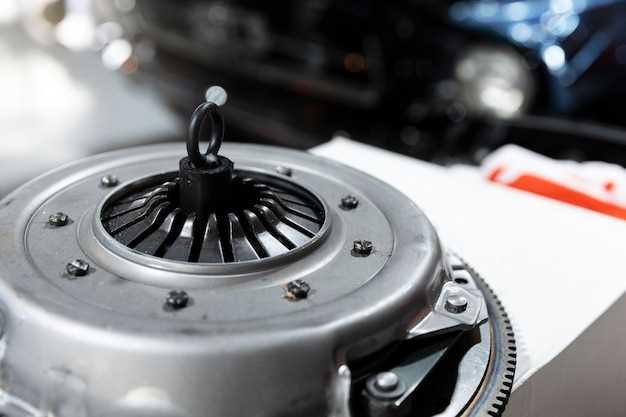
For owners of Toyota Land Cruiser diesel models, maintaining the engine’s performance and longevity is crucial. One of the key components that require regular inspection and timely replacement is the timing belt. The timing belt plays a vital role in synchronizing the engine’s camshaft and crankshaft, ensuring that the engine operates smoothly and efficiently.
Replacing the timing belt can prevent catastrophic engine failures that may arise from belt wear or breakage. In diesel engines, where stress levels and torque demands are typically higher, the importance of a well-maintained timing belt cannot be overstated. Thus, familiarity with the replacement process and knowing when to perform this essential maintenance task is invaluable for any Land Cruiser owner.
This guide will walk you through the steps necessary for replacing the timing belt in your Land Cruiser diesel. From gathering the right tools and materials to understanding the replacement procedure and ensuring proper tensioning, we will provide detailed insights to assist you in accomplishing this task safely and effectively.
Identifying Symptoms Indicating Timing Belt Wear
A diesel engine relies on an efficient timing belt to synchronize the crankshaft and camshaft, ensuring precise valve operation. Monitoring the timing belt for signs of wear is crucial for maintaining engine performance. Several symptoms can indicate that your timing belt may be deteriorating.
1. Audible Noise: One of the first indications of timing belt wear is unusual noise coming from the engine compartment. If you hear a ticking or rattling sound, it may suggest that the timing belt is fraying or that its tension has become loose.
2. Engine Misfire: If your diesel engine starts to misfire or operate inconsistently, a worn timing belt could be the cause. This happens when the timing belt does not maintain the correct synchronization, leading to improper valve timing and combustion issues.
3. Overheating: A failing timing belt can contribute to overheating in a diesel engine. If the belt has stretched or worn, it may not effectively keep the camshaft and crankshaft aligned, causing the engine to work harder and generate excess heat.
4. Oil Leaks: Inspect the vicinity of the timing belt cover for signs of oil leaks. A failing timing belt can cause the seals to wear out, leading to oil seepage that can signal a need for immediate attention.
5. Visible Cracks or Wear: A visual inspection can reveal cracks, fraying, or any signs of surface wear on the timing belt. If you notice any damage during routine checks, it’s imperative to replace the timing belt to prevent potential engine failure.
6. Engine Won’t Start: If your diesel engine fails to start, a worn or broken timing belt could be a culprit. In this case, the engine might not achieve the necessary timing for successful ignition, effectively preventing it from firing up.
Being vigilant about these symptoms can help you detect timing belt wear early, allowing for timely replacement and preventing severe engine damage.
Step-by-Step Process for Timing Belt Replacement
Replacing the timing belt on a Land Cruiser diesel is a crucial maintenance task that ensures the engine operates smoothly and efficiently. Follow these detailed steps to complete the replacement accurately.
1. Preparation: Begin by gathering the necessary tools and parts, including a new timing belt, tensioner, water pump (if applicable), and any gaskets. Ensure the vehicle is parked on a flat surface, and engage the parking brake.
2. Disconnect Battery: Safety is paramount. Disconnect the negative terminal of the battery to prevent any accidental electrical shorts while working.
3. Remove Engine Covers: Remove any necessary engine covers or components obstructing access to the timing belt area. This may include the air intake duct, plastic engine cover, and accessories like the alternator belt.
4. Align Engine to Top Dead Center (TDC): Rotate the crankshaft using a socket wrench until the engine reaches TDC on the compression stroke of the first cylinder. Verify alignment marks on the crankshaft and camshaft pulleys are aligned according to the manufacturer’s specifications.
5. Remove Timing Belt Tensioner: Carefully release tension on the timing belt by loosening the tensioner. Remove the timing belt from the pulleys, taking note of the routing for the new belt installation.
6. Inspect Components: Examine the timing belt, tensioner, and pulleys for wear and damage. Replace any components that show signs of wear. It’s advisable to replace the water pump if it’s due, as access is easier during this procedure.
7. Install New Timing Belt: Position the new timing belt on the pulleys following the routing diagram. Ensure the belt is properly seated and not twisted. Reapply tension using the tensioner according to the specified torque settings.
8. Recheck Alignment: Double-check that all alignment marks are still properly aligned after the belt installation. This step is critical to prevent engine damage.
9. Reassemble Components: Reattach the engine covers and any components removed during the disassembly process. Ensure all bolts are tightened to the recommended specifications.
10. Reconnect Battery: Reconnect the negative battery terminal and ensure all electrical connections are secure.
11. Test Engine: Start the engine and listen for any unusual noises. Check for leaks around the timing belt area and inspect the belt’s operation, ensuring it runs smoothly. Allow the engine to reach its normal operating temperature and monitor any performance issues.
By following these steps meticulously, the timing belt replacement on your Land Cruiser diesel will be successful, contributing to the longevity and reliability of your vehicle’s engine.
Best Practices for Maintaining Diesel Timing Belts

Regular maintenance of the diesel timing belt is essential for ensuring the longevity and performance of your engine. It is crucial to adhere to the manufacturer’s recommended maintenance schedule, which typically includes periodic inspections and replacements. Check the owner’s manual for specific intervals and guidelines.
Visual inspections of the timing belt should be conducted periodically. Look for signs of wear, such as fraying, cracks, or glazing. Any visible damage can indicate that the belt is nearing the end of its useful life and should be replaced promptly to avoid catastrophic engine failure.
Ensure that the timing belt tension is correctly adjusted. A belt that is too tight can lead to premature wear, while one that is too loose may result in slippage or misalignment. Regularly check the alignment of the timing belt relative to the pulleys, and make adjustments as necessary.
Clean the area around the timing belt during maintenance checks to prevent dirt and debris from causing damage. Accumulated grime can negatively affect the belt’s performance and longevity. Use appropriate tools for cleaning, ensuring that nothing interferes with the belt’s function.
When replacing timing belts, it’s advisable to replace associated components, such as pulleys, tensioners, and water pumps, to reduce the likelihood of future failures. Parts wear out in conjunction, and replacing them together can save time and costs in the long run.
Lastly, maintain a suitable operating temperature for your engine. Overheating can significantly impact timing belt durability, so ensure the cooling system is functioning correctly. Regular coolant changes and inspections can help keep your engine at an optimal temperature, thus protecting the timing belt.